Documentation & Tutorials
Please note, due to updates and changes some screens shown may be slightly different than whats shown.
File On-boarding
Upload files to Good2Go (internal users)
Single file size limit: 100MBs
Account max storage size: 20GBs
File types accepted:
PDF, JPEG, InDesign, EPS, Illustrator, Excel, Word, TXT, CSV, ZIP, and more. Good2Go only limits file types that may be harmful code.
Adding files to Good2Go is as easy as drag and drop. The most simple way for an internal user to get a file into Good2Go is to:
- Open Good2Go to the Desktop or destination folder.
- Drag and drop the file onto the drop zone in Good2Go.
- You can drag and drop multiple documents at once.
Other ways you can add in files to Good2Go is to:
- Send a document as a proof.
- Use an “Upload Link” from a folder.
- Open “Quick Job” and upload a file.
- Add files through the Good2Go Order Portal.
- Email a file to Good2Go.
Good things to know:
- When a new file is added to a folder, it will inherit the folder customer info.
- Once a file is in Good2Go, you can click, drag and drop the file into a visible folder.
- Maximum file storage default is 20GB. More storage can be added to your account at an additional cost. See the pricing page for more information or contact sales at Good2Go.
Client uploads to Good2Go
Single file size limit: 100MBs
Account max storage size: 20GBs
File types accepted:
PDF, JPEG, InDesign, EPS, Illustrator, Excel, Word, TXT, CSV, ZIP, and more. Good2Go only limits file types that may be harmful code.
Customers and outside partners can upload files to Good2Go five different ways.
- A folder upload link.
- A portal link
- From the review window*
- From a Good2Go order summary window
- From a “Job forward” window
(*) The file being reviewed must be located in a folder or be part of an order. The option for the client to upload is not available for loose files on the Good2Go desktop.
Folder Upload Link

Upload Link Screen 1. When using an Upload Link without a customer email already assigned to a folder, the upload will ask the customer to identify themselves by their email. Note the “Progressive Prints” logo would be where your logo shows up.

Upload Link Screen 2. Here the client can upload 1 or more files. Each file uploaded will be assigned their email automatically and the account holder will be notified of the upload.
Good things to know:
- Anytime an outside client uploads a document the Good2Go account holder will get an email notification of the upload. In contrast, Good2Go never sends notifications when the Good2Go account holder uploads a file or creates an order.
Upload files with descriptions (portal submission)
A portal is a managed folder that automatically creates a file structure for files and groups of files being submitted to Good2Go.
Order Portals allow internal and external users to upload files with:
- Customer contact data
- Product specifications
- Multiple parts of a single product
- General product specifications or desciption
- A deadline

Folder Portal: Once a folder is defined as a portal, it will have the additional portal icon next to the folder.
Any folder can be defined to be an Order portal. This allows you to create one for general uploading from your website and, if needed, client specific upload portals. This allows you to keep specific client jobs separated from general customer jobs.
Portal overview

Activating a portal. Select the folder by clicking on the selection box. Then select “Make Portal Link” from the righthand side panel.
Once a portal is active, you can link the URL it to a menu item, a button, a link on your website, or you can share the link in an email. See “Setting up a Portal” to learn more about how rho deploy a portal.
The following will overview the screens of a portal.
Screen 1: Enter email

Enter email. Here, the customer just needs to enter their email to identify themselves. Email is what Good2Go uses to identify a user.
Screen 2: Enter contact information

Enter contact information. Here the client will enter their contact information. All fields are optional and if the client has filled this in before, Good2Go will pre-fill in their information from the built in customer database.
Screen 3: Define job or files

Enter file/job information. The client can either start filling in information by dragging and dropping a file onto this window, or fill out the form first to describe the file to be printed. Page size and page count are automatically extracted from PDF documents. However the portal is not limited to PDFs only.
When data is entered by the user, the file data will not overwrite that data. Files such as CSV client lists to be used in a direct mail campaign can be defined as “Specifications not applicable“. When this is checked, Good2Go will not require a page size, or page count to be entered.
Multiple files. users can add multiple files with different specifications.
Screen 4: Additional specs

Additional specifications. On this screen the user can enter additional specifications such as folding, cutting to other finishing information, as well as define a deadline for the order to be completed.
Screen 5: Order summary and final review

Good things to know:
- If you enter an order from the same browser you’re logged into Good2Go, Good2Go will not send a notification to the end user because we assume you may be working on the order and don’t want to send a notice too early. That must be done manually from the Order specification screen.
Setting up an order portal
Any folder in Good2Go can be converted to an Order Portal. Following is how you activate a folder to be an order portal.
- Select the folder.
- From the right hand panel, select “Make Portal Link”

Folder Portal: Once a folder is defined as a portal, it will have the additional portal icon next to the folder.
Share a link

Select “Portal Link” from the action menu for the portal folder.
View Now

Select “View Now” to open the Good2Go Portal “Center” screen. This is where you can select which type of portal you want.
Portal “Center” screen

Good2Go has two types of portals for each portal folder. One is “Request a Quote” and the other is “Submit a Job”. Both portals work the same, however orders submitted through each will show up differently in Good2Go so you can see the difference between a request for a quote and a file submission.
Copy a link

Once you’re on the first screen of the upload portal, select the URL from the browser and copy this link. This is the link you can share or use to link your website to the portal.
Linking to your website
Linking to your web site can vary depending on web server technology used for your web site. In general, you will deploy the link as a link to text, a button, or a menu item.
Following is an example using a button. We use WordPress for our public website. Here are the steps to link to your web site.
- Copy the URL link as previously shown.
- Place a button on your web page.
- Select the button to display the settings.
- Paste in the URL in the settings.

Client specific folders and Portals
Folders and Portals can have a client assigned to the folder definition. By adding a client email to the folder all files submitted to that folder will inherit the client information. By adding a client to a portal, all new orders will automatically start with that clients email.
When configured correctly, a folder or a Portal can work for general customers or specific clients you work with often.
To help explain this, we made a short video.
The video shows the differences between a folder, a client folder, a portal, and a client portal.
Submit Email Order
submit@Good2GoSoftware.com
There’s also an email workflow for sending a proof.
See ” Send a proof using email workflow” to learn more.
Good2Go allows you to submit an order to Good2Go via email. All you do is forward the email from the client to Good2Go using the “Submit@Good2GoSoftware.com” email. The only restriction is you need to send the email from the email account associated with your Good2Go account.
The best way to understand this feature is to see it in action. Below is a short video.
Email workflow: Forward emails to Good2Go and have them automatically uploaded into Good2Go so all team members can see the email orders.
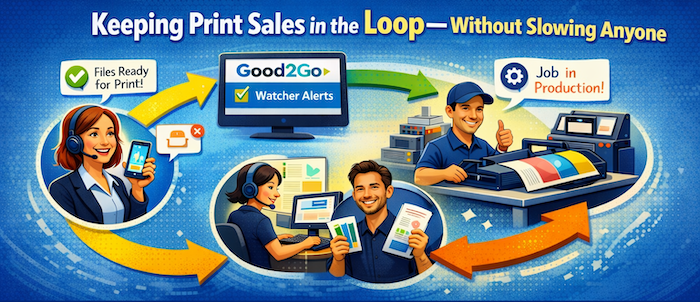
Submit Email Order – From sales rep to CSR workflow
submit@Good2GoSoftware.com
Covers how Good2Go team members can collaborate to on-board an email order sent to a sales rep.
Video Covers:
Email workflow
Assign Task
Watch a Job
Team workspace
This video covers one way for a company sales representative to receive a print order from a client and pass it onto a CSR for additional processing.
Email workflow: Forward emails to Good2Go and have them automatically uploaded into Good2Go so all team members can see the email orders.
File Limits
Following are the default file upload limits for Good2Go. Upgrades may be available. Contact Sales@Good2GoSoftware.com for more information.
- Maximum single file upload size: 100MBs
- Base file storage: 20GBs
- Default file idle time before deletion: 15 Days (expandable to 90 days)
File types accepted:
PDF, JPEG, InDesign, EPS, Illustrator, Excel, Word, TXT, CSV, ZIP, and more. Good2Go only limits file types that may be harmful code.
Dynamic Order Creation
Following is an overview of Dynamic Order Creation. This uses a customs URL to pre-fill a Good2Go portal order form so the client just needs to upload their final file for print. This is ideal for client who have presented a draft with their request for quote but still need to deliver a final document for print.
View the video below to see an overview. Click on the link to the left to request the specifications for how to structure the custom URL.